Roasting nuts is one of those simple pleasures that turns a humble snack into something deeply satisfying. There’s a magic in how heat wakes up their natural sweetness, intensifies their aroma, and adds a smoky depth that’s hard to beat. It’s a process that’s quick, forgiving, and endlessly customizable, making it perfect for a spontaneous snack or a thoughtful gift.
I’ve always loved how the kitchen smells when I roast mixed nuts—warm, toasty, with hints of caramel and earth. It’s a scent that instantly makes the whole house feel cozy, like a little moment of indulgence. Plus, once they’re roasted, they’re not just tasty—they’re better for snacking, baking, or topping salads, all with that rich, roasted crunch.
Roasted mixed nuts aren’t just about flavor—they’re about elevating something everyday into a little celebration. Whether I’m prepping for a casual gathering or just craving something satisfying after a long day, these nuts come through every time. The process is straightforward, but the result feels special, almost like a small, fragrant miracle that you can make in your own kitchen.
Focusing on how roasting nuts enhances their natural sweetness and adds a smoky depth that transforms a simple snack into a memorable treat.
The story behind this recipe
- This recipe was born out of a late-night craving for something crunchy and savory, but I didn’t want the usual store-bought mix. I started experimenting with different nuts, trying to find a balance between smoky, sweet, and a little salty. It’s funny how small tweaks—like a sprinkle of smoked paprika or a dash of maple syrup—can turn a simple handful into a real treat.
- One evening, I was roasting a batch while my kitchen filled with that irresistible aroma—warm, nutty, with a whisper of caramel and spice. I realized how much I missed those spontaneous moments of baking that remind me why I love cooking. Now, this mix is my go-to for snacking, gifting, or just grounding myself in a busy day.
- heading:
Key Ingredients and Tips
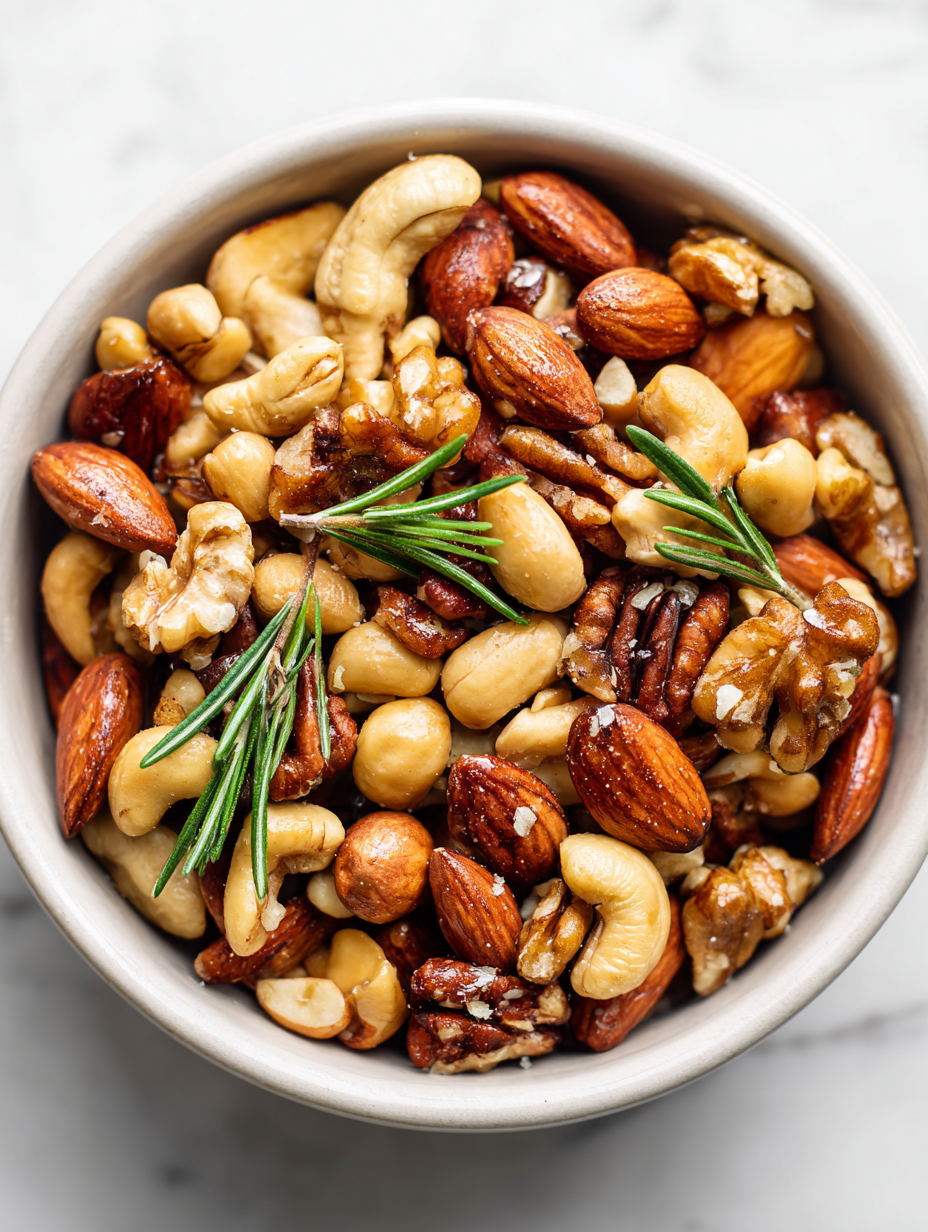
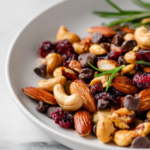
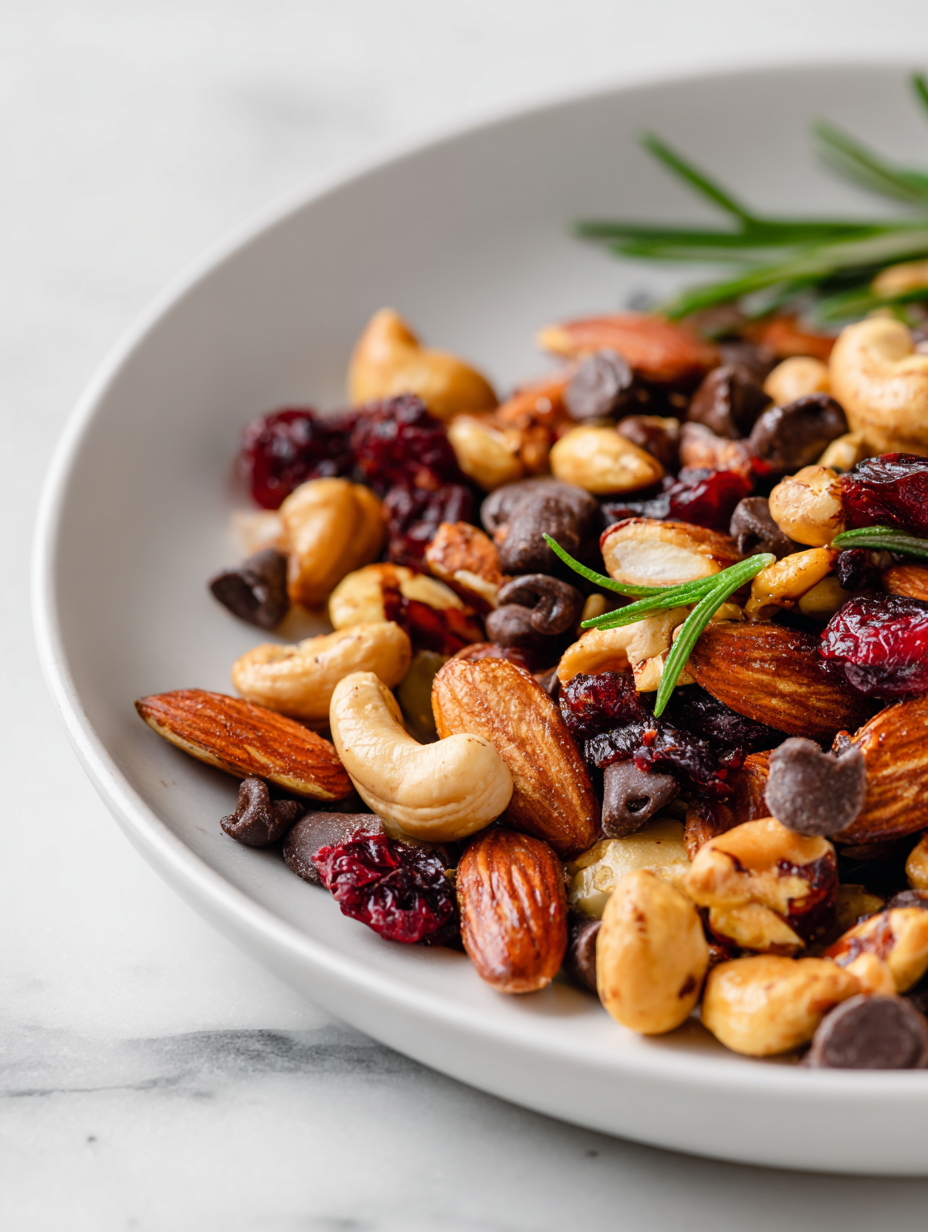
- Raw mixed nuts: I love using a variety—almonds, cashews, pecans—each adds a different texture and flavor. Feel free to swap in your favorites, but keep the mix balanced for even roasting.
- Olive oil or neutral oil: I prefer a light drizzle of olive oil—it helps the seasonings stick and promotes even browning. Skip it if you want a drier nut, but your roasted batch will be less shiny and slightly less flavorful.
- Sea salt: I like a generous pinch to enhance sweetness and add a savory punch. Use flaky sea salt for a subtle crunch or regular fine salt if that’s what you have, just don’t skimp.
- Sweetener (optional): A touch of maple syrup or honey adds a lovely caramelized gloss and depth. If you skip it, the nuts will be less sticky and more straightforward, but still delicious.
- Spices (paprika, cayenne, cinnamon): I often toss in smoked paprika for a smoky edge or cinnamon for warmth. Adjust to your taste—just a pinch can transform the profile, and the aroma is intoxicating.
- Optional extras (dried herbs, sugar): Dried rosemary or a sprinkle of brown sugar can give your mix a unique twist. Use sparingly—too much can overpower the natural nutty aroma or burn easily.
- Baking sheet: I prefer a rimmed sheet lined with parchment—easy cleanup and helps distribute heat evenly. An unlined pan can cause sticking or uneven roasting, so watch your nuts closely.
Spotlight on Key Ingredients
Mixed Nuts:
- I love using a variety—almonds, cashews, pecans—each brings a different texture and flavor. Feel free to customize, but keep the balance for even roasting.
- Olive oil: I prefer a light drizzle; it helps seasonings stick and promotes even browning. Use a neutral oil if you want a milder finish, but don’t skip it entirely.
Seasonings & Sweeteners:
- Sea salt: I like a generous pinch to really enhance the natural sweetness and add a savory punch. Flaky sea salt adds a nice crunch and subtle flavor, fine salt works too—just don’t skimp.
- Sweetener (optional): A splash of maple syrup or honey gives a caramelized gloss and extra depth. Skip it if you want a more straightforward, nutty flavor without added sweetness.
Notes for ingredient swaps
- Raw mixed nuts: I prefer a variety—almonds, cashews, pecans—each adds a different crunch and flavor. Swap in your favorites, but aim for a balanced mix for even roasting.
- Olive oil or neutral oil: I like a light drizzle of olive oil—helps the seasonings stick and promotes browning. Skip if you want drier nuts, but they’ll be less shiny and flavorful.
- Sea salt: I usually use flaky sea salt for texture, but regular fine salt works fine. Adjust to taste—more salt enhances flavor, less keeps it mild.
- Sweetener (optional): Maple syrup or honey adds caramel notes and a glossy finish. Omit if you prefer a more straightforward, nutty flavor without sweetness.
- Spices (paprika, cayenne, cinnamon): Smoked paprika gives a smoky kick, cinnamon adds warmth. Use your favorites—just a pinch for big aroma and flavor impact.
- Optional extras (dried herbs, sugar): Dried rosemary or a sprinkle of brown sugar can add flair. Use sparingly—too much can overpower or burn during roasting.
- Baking sheet: A rimmed sheet with parchment helps with cleanup and even heat. Avoid unlined pans to prevent sticking or uneven roasting.
Equipment & Tools
- Oven: To roast the nuts evenly at a controlled temperature.
- Baking sheet with parchment: Provides a flat surface for roasting and easy cleanup.
- Large mixing bowl: For tossing nuts with oil and seasonings.
- Spatula or spoon: To toss and spread nuts evenly.
Step-by-step guide to roasting nuts
- Preheat your oven to 180°C (350°F). Line a rimmed baking sheet with parchment paper for easy cleanup and even heat distribution.
- In a large bowl, combine 2 cups mixed nuts—almonds, cashews, pecans—whatever you like. Toss with 1 tablespoon olive oil until evenly coated.
- Add your preferred seasonings: ½ teaspoon sea salt, ½ teaspoon smoked paprika, and a teaspoon honey or maple syrup if using. Mix well so everything gets coated.
- Spread the nuts in an even layer on the prepared baking sheet. Make sure they’re not crowded—this helps them roast evenly and get crispy.
- Bake in the oven for 10-15 minutes. Shake the pan every 5 minutes to promote even browning. Keep an eye on them to prevent burning.
- Check for doneness: nuts should be golden brown, fragrant, and slightly crackling when moved. They’ll continue to crisp as they cool.
- Remove from oven and let cool on the baking sheet for 10 minutes. They’ll firm up and develop that irresistible roasted crunch.
- Transfer to a bowl or jar. Once fully cooled, they’re ready to snack, gift, or toss into salads and cheese boards.
Let the nuts cool completely on the baking sheet before storing in an airtight jar or container. They taste best once cooled and crisped, ready to be enjoyed or gifted.
How to Know It’s Done
- Nuts are golden and fragrant, with a slight shimmer of oil and seasoning.
- They crackle when moved, indicating a crispy texture.
- Cooling period is complete when nuts feel firm and no longer feel sticky.
Roasted Mixed Nuts
Ingredients
Equipment
Method
- Preheat your oven to 180°C (350°F) and line a baking sheet with parchment paper, creating a smooth, even surface for roasting.
- Place the mixed nuts in a large bowl, ensuring they’re spread out evenly without overcrowding, to promote uniform roasting.
- Drizzle the olive oil over the nuts, then toss with a spatula or spoon until they’re lightly coated and shiny.
- Add the sea salt, smoked paprika, and honey or maple syrup, then toss again to evenly distribute the seasonings and coat all pieces thoroughly.
- Spread the seasoned nuts in a single layer on the prepared baking sheet, making sure they’re not overlapping too much for even roasting.
- Bake in the oven for 10 to 15 minutes, shaking the pan every 5 minutes to promote even browning and prevent burning.
- Watch closely as the nuts turn golden and fragrant, with a slight crackling sound indicating they’re crispy and toasted to perfection.
- Remove the baking sheet from the oven and let the nuts cool completely on the sheet for about 10 minutes, allowing them to crisp up further.
- Once cooled, transfer the nuts to an airtight container or jar for storage, or serve immediately for a crunchy, flavorful snack.
Notes
Pro tips for perfect roasted nuts
- Use a light coating of oil to promote even browning and prevent sticking.
- Shake the pan halfway through roasting to ensure all nuts toast uniformly.
- Keep a close eye during the last few minutes to avoid burning—the aroma will turn from fragrant to acrid.
- Cool nuts completely on the baking sheet; residual heat continues cooking and crisps them up.
- For extra flavor, toss nuts with seasonings while still warm—this helps them absorb the spices better.
- Use parchment paper to prevent sticking and make cleanup easier, especially if using sweeteners or spices.
- If nuts start to smoke, lower the oven temperature slightly and increase air circulation—your nose will thank you.
Common mistakes and how to fix them
- FORGOT to check oven temperature → Always verify your oven’s accuracy before roasting.
- DUMPED too much salt → Keep salt measurements moderate; you can always add more after roasting.
- OVER-TORCHED nuts → Remove nuts as soon as they turn golden; residual heat continues to cook them.
- MISSED cooling step → Let nuts cool completely to crisp up and prevent sogginess.
Quick fixes for roasting nuts
- When nuts burn quickly, splash a little water on the pan to cool and calm the heat.
- If nuts are too salty, rinse and dry them before roasting again for a less intense flavor.
- DUMPED too much oil? Patch with a quick sprinkle of salt and stir well to distribute.
- Over-torched nuts? Shake off the burnt bits, and toast a fresh batch if needed.
- When aroma is faint, shield nuts with foil and extend roasting time slightly for richer smell.
Prep, store, and reheat tips
- Prep the nuts and seasonings a day ahead for deeper flavor absorption; store in an airtight container in the fridge.
- Roasted nuts stay fresh for up to 2 weeks at room temperature in a sealed jar, maintaining crunch and aroma.
- For longer storage, freeze roasted nuts for 1-2 months; keep in a freezer-safe bag, and bring to room temp before serving to regain aroma.
- Reheat nuts gently in a low oven (about 150°C/300°F) for 5-7 minutes until warmed and fragrant, avoiding over-roasting and loss of crunch.
Top questions about roasted mixed nuts
1. How do I know when the nuts are roasted properly?
Look for nuts that are fragrant and slightly golden, with no burnt spots. The smell should be warm and toasty.
2. What equipment do I need for roasting nuts?
Use a rimmed baking sheet for even heat and easy stirring. Parchment paper helps prevent sticking and makes cleanup a breeze.
3. Should I oil the nuts before roasting?
Toss the nuts with a bit of oil and seasonings before roasting. This helps flavors stick and promotes even browning.
4. How should I store roasted mixed nuts?
Store cooled nuts in an airtight container at room temperature for up to 2 weeks, or freeze for longer storage.
5. What if my nuts burn during roasting?
If nuts start to burn, remove them immediately and lower the oven temperature for the next batch. Keep a close eye near the end.
6. Can I use different types of nuts in the mix?
Use a mix of your favorite nuts, but keep the size consistent for even roasting. Feel free to experiment with new varieties.
7. What are signs my nuts are done?
Roast nuts until they are golden and fragrant, and listen for a crackling sound when they move—these are good signs.
8. Can I flavor the nuts after roasting?
You can add spices like paprika or cinnamon for extra flavor. Adjust seasoning amounts to suit your taste, adding more after roasting if needed.
9. Can I prepare roasted nuts ahead of time?
Yes, you can roast nuts in advance, store them, and reheat gently to bring back their aroma and crunch.
10. What should I do if my nuts are over-salted or burnt?
For a quick fix if nuts are too salty, rinse and dry them before roasting again. For burnt nuts, remove the burnt bits and try again with lower heat.
There’s something about the aroma of roasted nuts that feels like a small celebration. The smoky, sweet scent fills the kitchen, making it hard to wait before snacking. This recipe is simple, but it transforms everyday nuts into a little treat you’ll come back to often.
In the end, it’s about those honest, toasty bites that remind you why good, homemade snacks beat store-bought every time. Whether for a quick fix or a thoughtful gift, these nuts hold a kind of quiet satisfaction. And honestly, once you get the hang of it, you’ll be roasting nuts all year round.

Hi, I’m Lily Hayes, the cook, writer, and heart behind Loving This Process. This blog is built on a simple idea that food is not just about the final dish, but about everything that happens while you’re making it. The thinking, the tasting, the adjusting, the learning, and the quiet moments in between. Food has been a constant presence in my life, not as something flashy or perfect, but as something deeply grounding. Cooking has always felt like a process worth savoring, even when it’s messy, slow, or imperfect.


Leave a Reply