Candy corn fudge is a weird little relic from the ’80s that I never quite outgrew. It’s got that gooey, sweet, slightly chewy texture that’s hard to resist. Making it at home feels like capturing a piece of the past, but with a little more control over the sweetness and ingredients.
Why I Keep Coming Back to This Fudge
It’s a perfect mix of childhood nostalgia and simple ingredients. Each batch reminds me of holiday gatherings and quiet afternoons. Plus, it’s quick to make but feels special—like a little homemade treasure.
Breaking Down the Sweetness
- Sweetened condensed milk: The glue that holds everything together, adds richness and a sweet, milky flavor.
- White chocolate: Gives a silky base; swap with butterscotch chips for a different vibe.
- Candy corn: Chewy, colorful, iconic—adds texture and nostalgia, with a hint of vanilla and honey.
- Vanilla extract: Boosts sweetness with warm, floral notes; can substitute with almond extract for a different aroma.
- Orange extract: A splash of citrus brightness that cuts through the sweetness; lemon zest works in a pinch.
- Sea salt: A pinch enhances all flavors; skip if you prefer a sweeter, mellow fudge.
- Optional: cinnamon or nutmeg: A dash can warm up the sweet profile; skip for a purist approach.
Tools of the Trade for Sweet Success
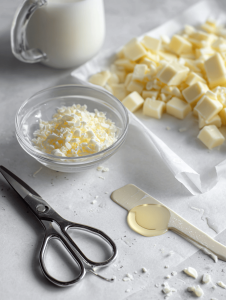
- Double boiler or microwave-safe bowl: Melts the chocolate gently without scorching.
- Spatula: Stirs and smooths the mixture into the pan.
- Parchment paper: Prevents sticking and makes removal easier.
- Sharp knife or pizza cutter: Cuts the fudge into neat squares.
Step-by-step to Candy Corn Fudge
Step 1: Line a 20cm (8-inch) square pan with parchment paper, leaving overhang on two sides.
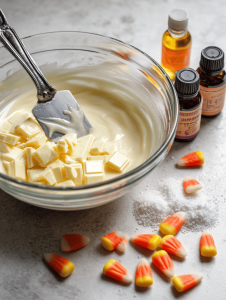
Step 2: Combine 1 can (14 oz) sweetened condensed milk with 2 cups chopped white chocolate in a heatproof bowl.
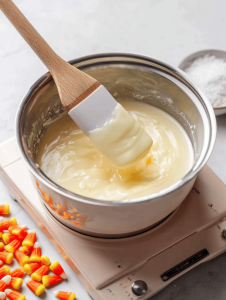
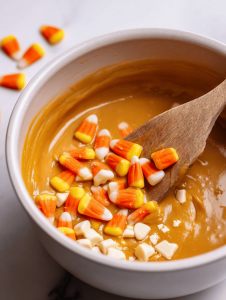
Step 3: Gently melt over a double boiler or in short bursts in the microwave, stirring often until smooth.
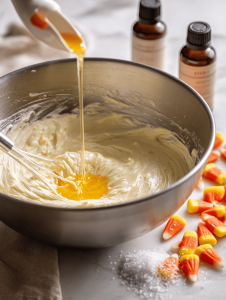
Step 4: Stir in 1 teaspoon vanilla extract and 1/2 teaspoon orange extract for a citrusy zing.
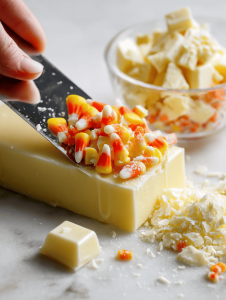
Step 5: Fold in 1 1/2 cups candy corn, saving a few for topping.
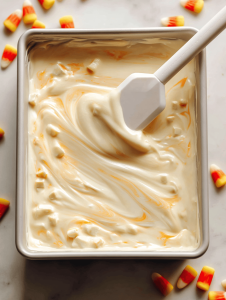
Step 6: Pour mixture into prepared pan, smoothing the top with a spatula.
Step 7: Sprinkle reserved candy corn on top, pressing lightly to embed.
Step 8: Let set at room temperature for at least 4 hours, or until firm.
Step 9: Once firm, lift fudge out of the pan using the parchment overhang and cut into squares.
Cues and Clues for Perfect Fudge
- The mixture should be smooth and glossy before pouring.
- Fudge should be firm but not hard after chilling—test with a gentle press.
- Candy corn should be partially melted but still recognizable on top.
Common Slip-Ups and How to Fix Them
- Overheating the chocolate causing it to seize.? IF THE MIXTURE SEIZES, remove from heat and stir in a teaspoon of vegetable oil.
- Fudge remains soft and runny.? IF THE FUDGE is too soft, let it chill longer or add a touch more chopped chocolate.
- Candy corn sinking or floating unevenly.? IF CANDY CORN sinks too much, press it into the surface after pouring.
- Uneven or jagged edges.? IF FUDGE cracks when cutting, let it sit at room temperature before slicing.

Candy Corn Fudge
Ingredients
Equipment
Method
- Line an 8-inch square pan with parchment paper, leaving overhang on two sides for easy removal.
- Combine the sweetened condensed milk and chopped white chocolate in a heatproof bowl.
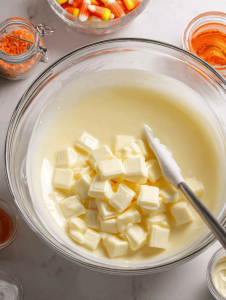
- Gently melt the mixture over a double boiler or in short bursts in the microwave, stirring often until smooth and glossy.
- Stir in the vanilla and orange extracts, mixing well until fragrant.
- Fold in most of the candy corn, saving a few for topping, until evenly distributed.
- Pour the mixture into the prepared pan and use a spatula to smooth the top evenly.
- Sprinkle the reserved candy corn over the surface and gently press them into the fudge.
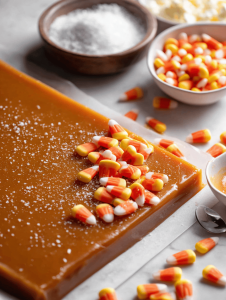
- Let the fudge set at room temperature for at least 4 hours or until firm.
- Once firm, lift the fudge out of the pan using the parchment overhang and place on a cutting board.
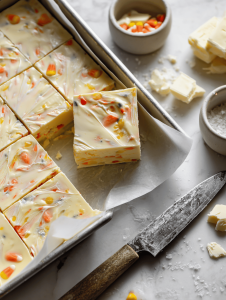
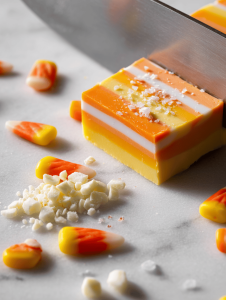
- Cut into neat squares with a sharp knife or pizza cutter, revealing colorful layers inside.
- Serve immediately or store in an airtight container at room temperature for up to a week.
Notes

Hi, I’m Lily Hayes, the cook, writer, and heart behind Loving This Process. This blog is built on a simple idea that food is not just about the final dish, but about everything that happens while you’re making it. The thinking, the tasting, the adjusting, the learning, and the quiet moments in between. Food has been a constant presence in my life, not as something flashy or perfect, but as something deeply grounding. Cooking has always felt like a process worth savoring, even when it’s messy, slow, or imperfect.


Leave a Reply