Sweet potato chips baked in the oven might sound simple, but there’s a surprising depth to their flavor and crunch that keeps me coming back. Unlike fried chips, these are lighter, and the natural sugars caramelize beautifully, giving you that smoky-sweet bite without the greasy mess.
I started making these as a way to satisfy my snack cravings without overdoing it on oil or salt. The process is honest—just thin slices, a little oil, and patience in the oven. Watching them turn from pale to golden with crisp edges is almost meditative, and the aroma that drifts through the kitchen? Pure comfort.
What really makes this recipe stick with me is how adaptable it is. You can toss in a pinch of cinnamon, a sprinkle of paprika, or even a dash of chili powder. It’s a humble snack that feels special, perfect for those evenings when you want something warm, crunchy, and a little bit sweet.
This recipe focuses on the surprisingly addictive aspect of sweet potato chips that are baked, not fried, making them a healthier yet still deeply satisfying snack. I love how the natural sweetness of the potatoes caramelizes in the oven, creating a crispy edge with a slightly smoky flavor that’s perfect for binge-watching or sharing.
The story behind this recipe
- This recipe came about one lazy weekend when I found a bag of sweet potatoes lurking in the back of the pantry. I was craving something crunchy, but not fried, and the idea of baking thin slices just clicked. It’s funny how a simple snack can turn into a little ritual, especially when I want something satisfying without the fuss of deep frying.
- I remember the first batch I made—watching those slices turn from pale to golden, edges curling up like tiny chips, that smell of caramelized sugars filling the air. It felt like a small act of rebellion, choosing wholesome over greasy, and still ending up with something totally addictive. Now, it’s become my go-to for a quick, wholesome snack that actually feels indulgent.
- heading: ‘The story behind this recipe’
Key ingredients and tips
- Sweet potatoes: I prefer the orange variety for their natural sweetness and vibrant color, but you can try different types for varied flavor profiles.
- Olive oil: Just a light coating helps the chips crisp up; too much, and they can turn greasy. Use a good quality, neutral oil if possible.
- Salt: I like finishing with flaky sea salt for that satisfying crunch and burst of saltiness, but seasoned salts or chili flakes work well if you want a flavor twist.
- Optional spices: A pinch of smoked paprika or cinnamon adds warmth and depth—start small and adjust to taste.
- Sugar or honey: A tiny drizzle can enhance caramelization, but be cautious—too much and the chips might burn quickly, creating a bitter edge.
- Lemon juice: A splash before baking brightens the natural sweetness and adds a subtle zing—don’t skip it if you want a fresh, lively flavor.
- Parchment paper: Lining your baking sheet prevents sticking and makes cleanup easier, especially since the sugars can caramelize fiercely.
Spotlight on key ingredients
Sweet potatoes:
- I prefer the orange variety for their natural sweetness and vibrant color, but you can try different types for varied flavor profiles.
- Olive oil: Just a light coating helps the chips crisp up; too much, and they can turn greasy. Use a good quality, neutral oil if possible.
- Salt: I like finishing with flaky sea salt for that satisfying crunch and burst of saltiness, but seasoned salts or chili flakes work well if you want a flavor twist.
Spices and flavor enhancers:
- Optional spices: A pinch of smoked paprika or cinnamon adds warmth and depth—start small and adjust to taste.
- Sugar or honey: A tiny drizzle can enhance caramelization, but be cautious—too much and the chips might burn quickly, creating a bitter edge.
- Lemon juice: A splash before baking brightens the natural sweetness and adds a subtle zing—don’t skip it if you want a fresh, lively flavor.
Notes for ingredient swaps
- Sweet potatoes: I prefer the orange variety for their natural sweetness and vibrant color, but you can try different types for varied flavor profiles.
- Olive oil: Just a light coating helps the chips crisp up; too much, and they can turn greasy. Use a good quality, neutral oil if possible.
- Salt: I like finishing with flaky sea salt for that satisfying crunch and burst of saltiness, but seasoned salts or chili flakes work well if you want a flavor twist.
- Optional spices: A pinch of smoked paprika or cinnamon adds warmth and depth—start small and adjust to taste.
- Sugar or honey: A tiny drizzle can enhance caramelization, but be cautious—too much and the chips might burn quickly, creating a bitter edge.
- Lemon juice: A splash before baking brightens the natural sweetness and adds a subtle zing—don’t skip it if you want a fresh, lively flavor.
- Parchment paper: Lining your baking sheet prevents sticking and makes cleanup easier, especially since the sugars can caramelize fiercely.
Equipment & Tools
- Mandoline or sharp knife: To slice potatoes uniformly thin for even baking.
- Baking sheet: To hold the chips during baking, ensuring they lay flat.
- Parchment paper: To prevent sticking and facilitate cleanup.
- Spatula: To flip or remove chips without breaking them.
- Wire rack (optional): To cool chips and maintain crispness after baking.
Step-by-step guide to baked sweet potato chips
- Preheat your oven to 200°C (390°F). Line a baking sheet with parchment paper to prevent sticking and make cleanup easier.
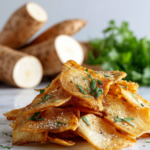
- Wash and scrub 2 large sweet potatoes thoroughly. No need to peel unless you prefer them that way.
- Slice the sweet potatoes very thin, about 1/16 inch (1.5 mm), using a mandoline or a sharp knife. Uniform slices ensure even baking.
- Place the slices in a large bowl. Drizzle with 1-2 tablespoons of olive oil, tossing gently to coat each piece evenly.
- Sprinkle with about 1 teaspoon of sea salt, and add optional spices like paprika or cinnamon if desired. Toss again.
- Arrange the slices in a single layer on the prepared baking sheet, not overlapping. Use tongs or a fork to handle the slices without breaking them.
- Bake in the preheated oven for 15-20 minutes. Keep an eye on them after 10 minutes to prevent burning.
- After 10 minutes, check the color and edges. They should be golden and crispy at the edges, with a slight bend. If not, continue baking in 2-minute intervals.
- Flip the chips carefully with a spatula at the halfway point for even crisping. Watch for bubbling and crackling sounds as a sign of readiness.
- Once crispy and golden, remove from the oven. Let them rest on the baking sheet for 2-3 minutes to firm up.
- Transfer to a wire rack or plate. If they cool too long on the sheet, they might lose some crispness.
- Serve immediately or store in an airtight container once cooled completely. Reheat in a 180°C (350°F) oven for 5 minutes if needed.
Allow chips to cool on a wire rack for 2-3 minutes. Serve immediately for maximum crunch or store in a sealed container once fully cooled.
How to Know It’s Done
- Color: edges are deep golden brown, not pale or burnt.
- Texture: chips are crispy and snap when broken, not limp or chewy.
- Appearance: evenly baked, no soggy or undercooked spots.
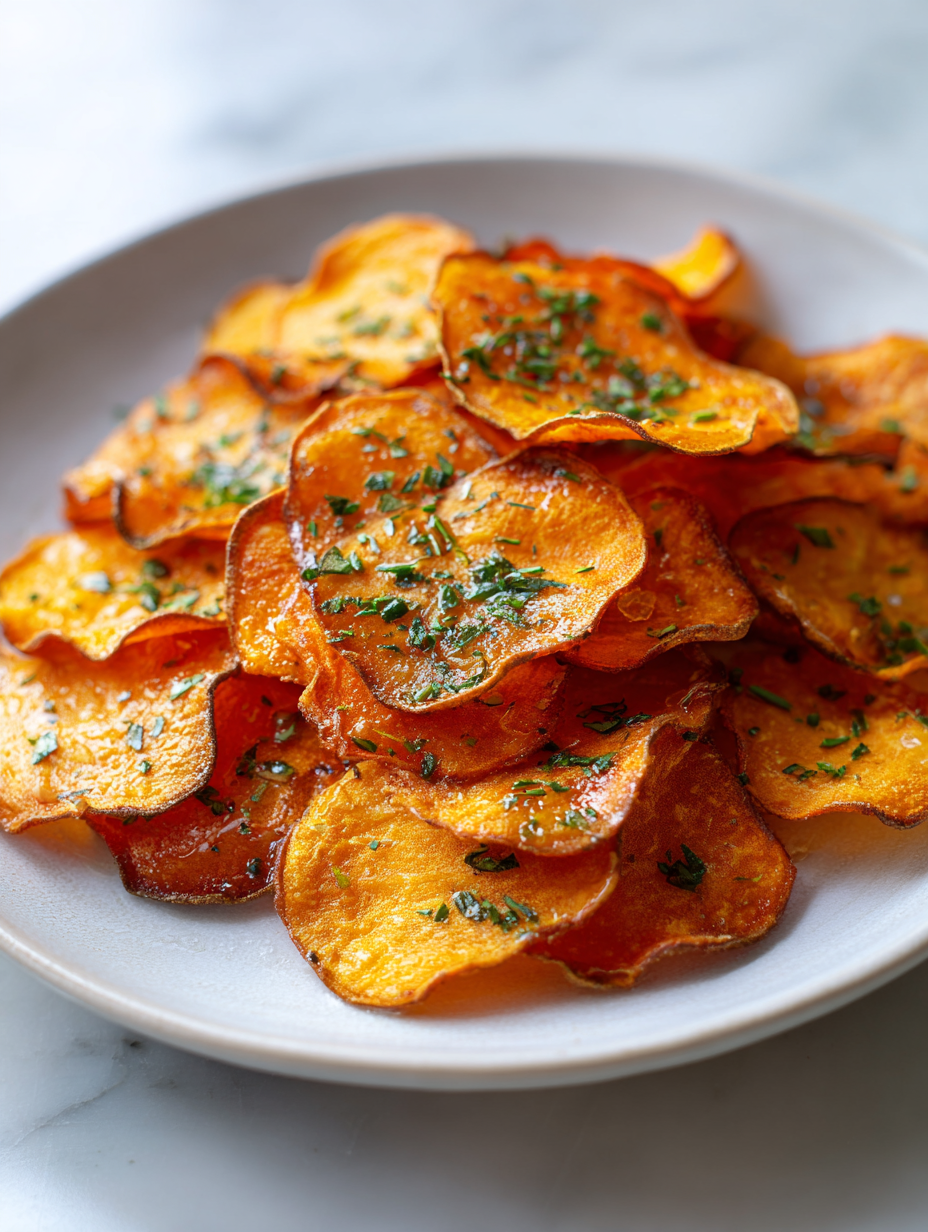
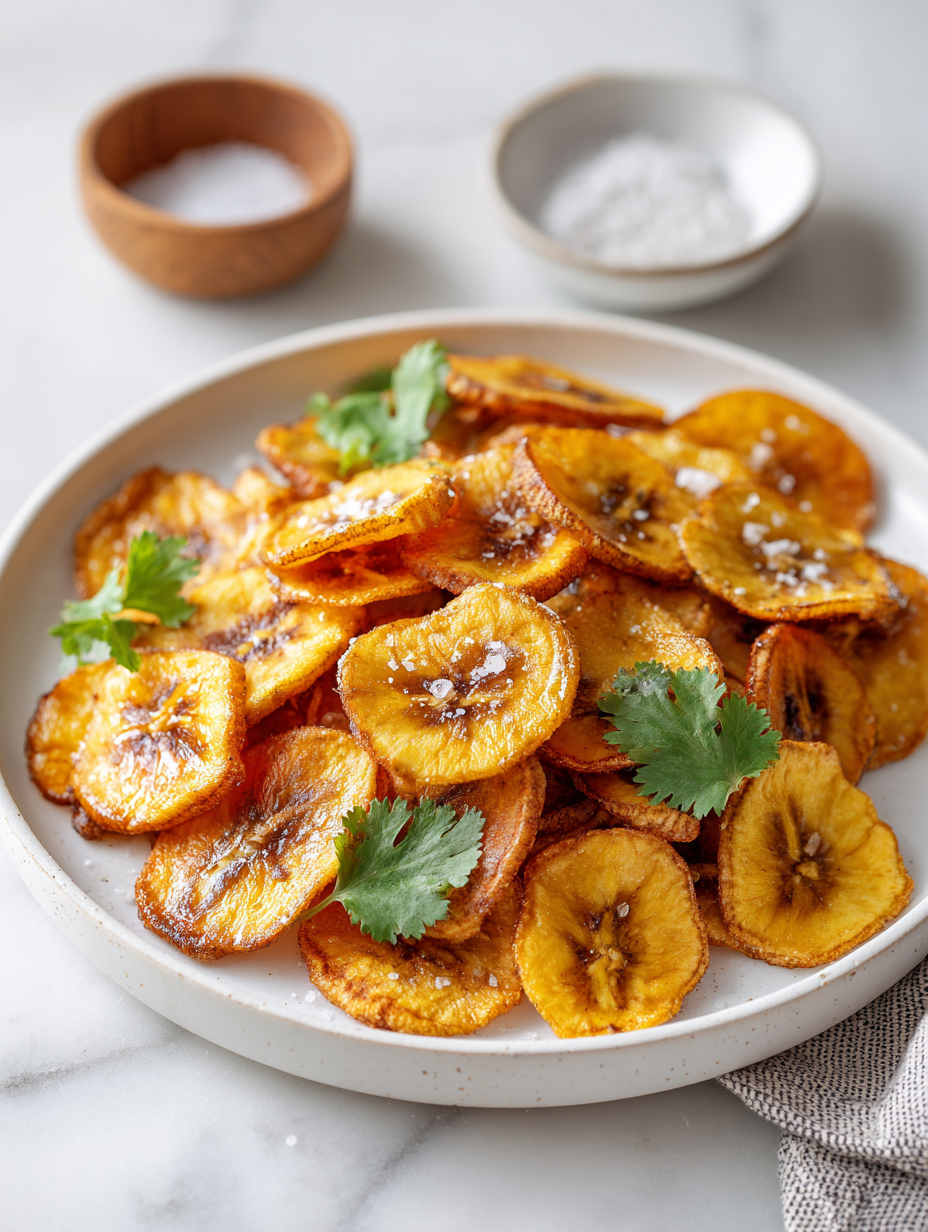
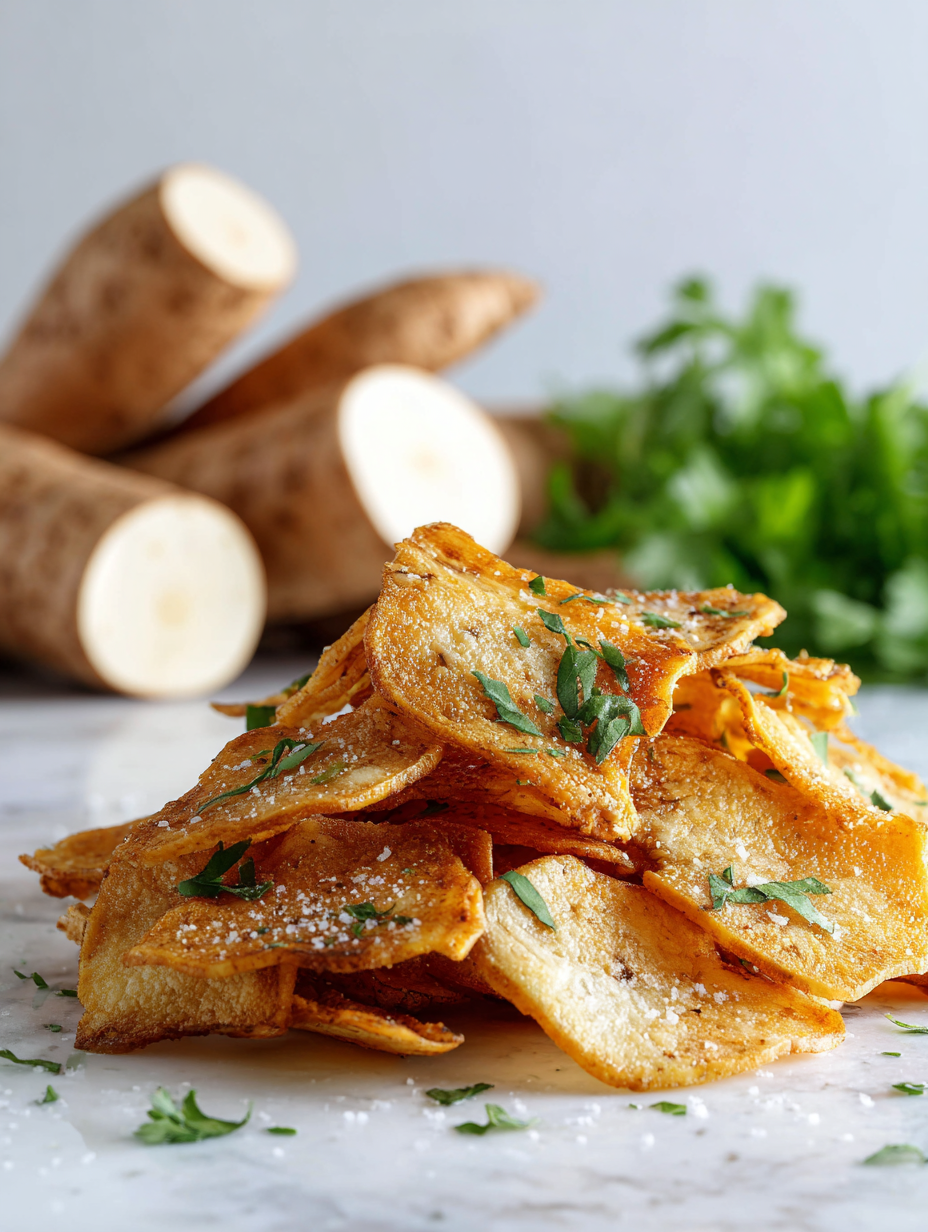
Baked Sweet Potato Chips
Ingredients
Equipment
Method
- Preheat your oven to 200°C (390°F) and line a baking sheet with parchment paper to prevent sticking.
- Wash and scrub the sweet potatoes thoroughly, then slice them very thinly, about 1/16 inch, using a mandoline or sharp knife for uniform thickness.
- Place the slices in a large bowl and drizzle lightly with olive oil, tossing gently to coat each piece evenly.
- Sprinkle the slices with sea salt and any optional spices you like, then toss again to distribute the seasonings evenly.
- Arrange the slices in a single layer on the prepared baking sheet, making sure they do not overlap for even baking and crisping.
- Bake for 15-20 minutes, flipping the slices carefully with a spatula halfway through, until they are golden brown and crispy around the edges, and smell sweet and caramelized.
- Once crispy and golden, remove the chips from the oven and transfer them to a wire rack or plate to cool slightly for 2-3 minutes, which helps them firm up.
- Finish with a squeeze of lemon juice for brightness, then serve immediately or store in an airtight container once cooled for a crispy snack later.
Notes
Pro tips for perfect chips
- Thin slices are key → Use a mandoline for uniform, crispy chips.
- Even coating matters → Toss slices gently in oil to prevent soggy spots.
- Watch the edges → Remove chips as soon as they turn deep golden to avoid bitterness.
- Flip halfway → Turn chips at 10-minute mark for even crispness and color.
- Use parchment paper → Keeps chips from sticking and makes cleanup easier.
- Cool on a rack → Rest chips 2-3 minutes to retain maximum crunch.
- Adjust oven rack → Position in middle for even heat distribution and optimal crisping.
Common mistakes and how to fix them
- FORGOT to evenly slice → Thin, uniform slices ensure crisp chips.
- DUMPED sugar directly on potatoes → Mix sugar with oil for even caramelization.
- OVER-TORCHED edges → Remove chips at first golden edges to avoid bitterness.
- MISSED flipping halfway → Flip chips at 10 minutes for even browning.
Quick fixes and pantry swaps
- If chips burn quickly, lower oven temperature and watch closely during the last 5 minutes.
- When slices stick, line your baking sheet with parchment paper to prevent tearing and sticking.
- Splash a few drops of lemon juice on potatoes before slicing to prevent browning and add brightness.
- Patch uneven cooking by flipping chips halfway through baking for uniform crispness.
- Shield edges from over-torching by tenting with foil if they brown too fast, preserving flavor and crunch.
Prep, store, and reheat tips
- Slice sweet potatoes ahead of time; store in an airtight container in the fridge for up to 24 hours to keep them from browning and drying out.
- You can bake the chips a day in advance; store in a sealed container at room temperature for up to 2 days. Crispness may slightly diminish, but reheating helps.
- For longer storage, freeze cooled chips in a freezer-safe bag for up to a month. Reheat in a 180°C (350°F) oven until crispy again, about 5 minutes, watching for smoky edges.
- Reheating chips can sometimes soften them; to restore crunch, spread on a baking sheet and re-bake at 180°C (350°F) for 5 minutes or until crisp and fragrant.
Top questions about sweet potato chips
1. How thin should I slice the sweet potatoes?
Use a sharp knife or mandoline to slice the sweet potatoes very thinly, around 1/16 inch, for maximum crispness.
2. What temperature and how long to bake?
Bake at 200°C (390°F) for 15-20 minutes, flipping halfway. Look for golden edges and a crispy texture.
3. Do I need parchment paper?
Line your baking sheet with parchment paper to prevent sticking and make cleanup easier, especially since sugars caramelize.
4. Why aren’t my chips crispy?
If chips aren’t crispy, they might be too thick or underbaked. Return to oven and bake a few more minutes.
5. How do I store and reheat leftovers?
Store cooled chips in an airtight container at room temperature for up to 2 days; reheat at 180°C (350°F) to crisp.
6. How much oil should I use?
Use a light coating of olive oil to help chips crisp up without greasiness. Too much oil makes them soggy.
7. Can I add spices?
Adding a pinch of smoked paprika or cinnamon can add warmth and depth, but start small and taste.
8. Can I use other root vegetables?
Sweet potatoes can be substituted with purple yams for a different flavor and color, though cooking times may vary.
9. How do I know when they’re done?
Watch the edges carefully after 10 minutes; remove chips as soon as they turn deep golden to prevent burning.
10. Why are my chips sticking together?
If chips stick together, gently separate slices before baking or space them out more on the sheet.
These baked sweet potato chips carry a quiet magic—crisp, slightly smoky, with a natural sweetness that feels just right. Making them at home means you get to tweak every bite, turning a simple snack into a small act of care.
In times when I need a break from greasy snacks, these chips offer a wholesome fix that’s satisfying and honest. They remind me that good things come from straightforward ingredients and just a little patience in the oven.

Hi, I’m Lily Hayes, the cook, writer, and heart behind Loving This Process. This blog is built on a simple idea that food is not just about the final dish, but about everything that happens while you’re making it. The thinking, the tasting, the adjusting, the learning, and the quiet moments in between. Food has been a constant presence in my life, not as something flashy or perfect, but as something deeply grounding. Cooking has always felt like a process worth savoring, even when it’s messy, slow, or imperfect.
Leave a Reply