Growing up, those crispy, salty potato chips were a staple at every sleepover and family picnic. But the greasy bag always left me feeling sluggish, and I started craving a version that still delivers that satisfying crunch without the heaviness. That’s how I started experimenting with baked potato chips—simple, healthier, and surprisingly addictive.
This recipe is a nod to childhood nostalgia, but with a little twist. Baked, not fried, they’re easy to make and customizable with your favorite seasonings. Plus, they’re perfect for those moments when you want a crunchy snack but don’t want to dive into a bag of greasy chips again.
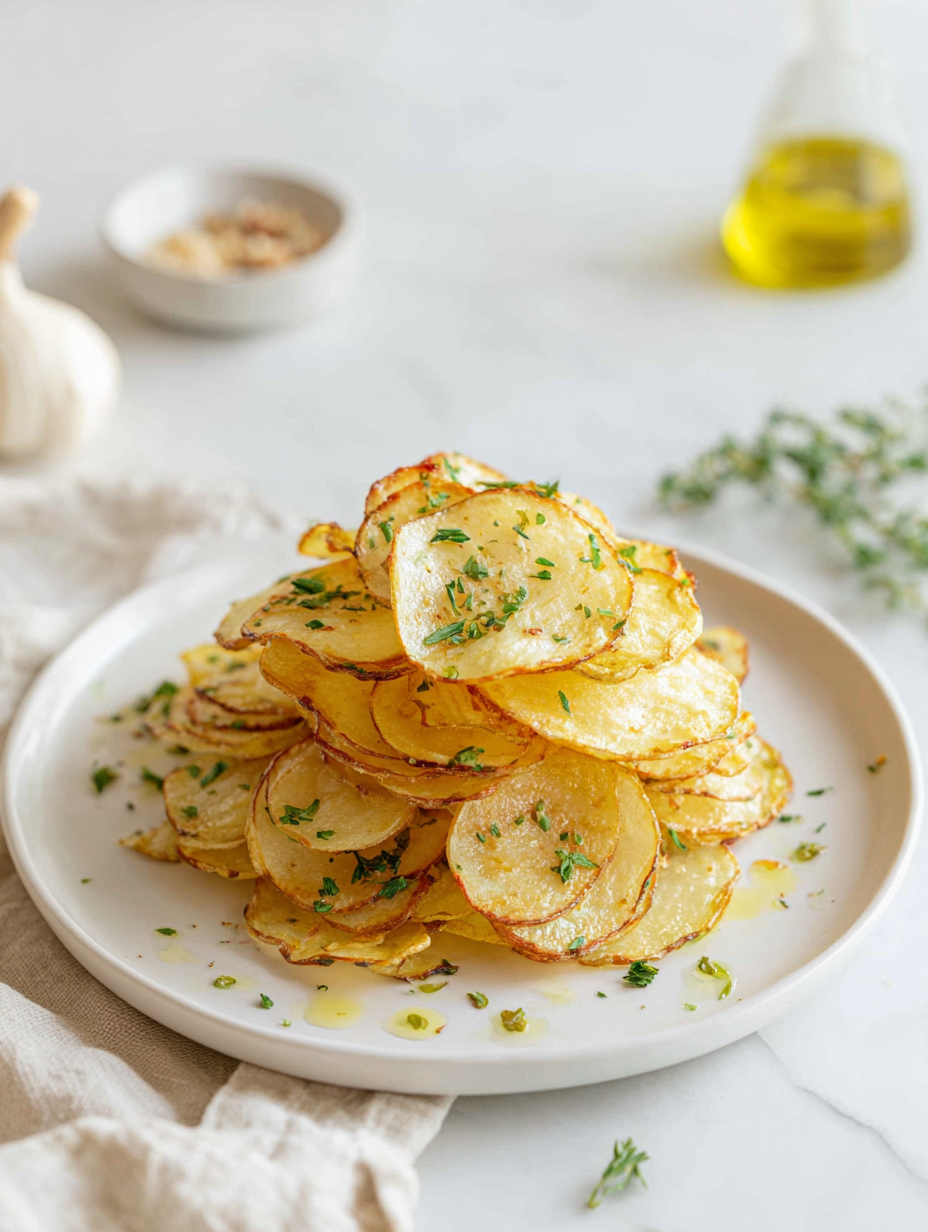
Focusing on the nostalgic crunch of childhood snacks, but reimagined as a healthier, baked version that captures that satisfying snap without the greasy aftermath.
The story behind this recipe
- I remember the first time I tried baking potato chips instead of frying them—there was this unexpected crunch that rivaled store-bought, but with way less guilt. It was a small victory in my kitchen, turning something greasy into something light and crispy. That moment made me realize how simple swaps can change snack time forever.
- This recipe came out of lazy weekends when I had a bag of potatoes that wouldn’t quite make it as fries but begged to be turned into something fun. I love that I can tweak the seasonings each time, making it a new snack adventure. And honestly, it’s become my go-to for guilt-free munching, especially when friends drop by unannounced.
- heading: The story behind this recipe
Ingredient breakdown: key components
- Thinly sliced potatoes: I prefer using a mandoline to get even, paper-thin slices that crisp up perfectly. Thicker slices tend to stay soft inside. Try adjusting thickness until you find your perfect snap.
- Olive oil: Just a light coat helps the chips crisp without greasiness. I like the fruity brightness it adds. If you want less fat, skip the oil, but your chips might be less uniformly crispy.
- Sea salt: I sprinkle generously for that punch of flavor. Using flaky sea salt makes a noticeable difference—crunchy and just slightly briny. For a different twist, try smoked salt for a smoky undertone.
- Paprika or seasonings: I love a smoky paprika for depth. A dash of garlic powder or cayenne gives a flavor boost. Keep seasonings light early on, then adjust after baking for even coating.
- Baking sheet & parchment: I always line my sheet to prevent sticking and make cleanup easier. A silicone baking mat works too. Make sure slices aren’t overlapping—crowding leads to sogginess.
- Oven temp: I find 160°C (320°F) gives a slow, even bake that crisps without burning. Keep an eye after 15 minutes; chips can go from perfect to burnt quickly if left too long.
- Cooling rack: I transfer the chips here immediately after baking. It allows air to circulate and keeps them crispy. Don’t skip this step or they’ll lose their crunch as they cool.
Spotlight on key ingredients
Potatoes:
- Thinly sliced potatoes: I prefer using a mandoline to get even, paper-thin slices that crisp up perfectly. Thicker slices tend to stay soft inside. Try adjusting thickness until you find your perfect snap.
- Olive oil: Just a light coat helps the chips crisp without greasiness. I like the fruity brightness it adds. If you want less fat, skip the oil, but your chips might be less uniformly crispy.
Seasonings:
- Sea salt: I sprinkle generously for that punch of flavor. Using flaky sea salt makes a noticeable difference—crunchy and just slightly briny. For a different twist, try smoked salt for a smoky undertone.
- Smoked paprika or garlic powder add depth. A dash of cayenne gives a gentle kick. Keep seasonings light early on, then adjust after baking for even coating.
Notes for ingredient swaps
- Dairy-Free: Skip butter or cheese. Use a splash of lemon juice or vinegar for brightness—keeps that oozy tang without dairy.
- Gluten-Free: Regular soy sauce can be swapped for tamari or coconut aminos. Keeps umami rich without the wheat.
- Sweetener: Honey or maple syrup can replace sugar in some seasonings for a subtle sweetness that caramelizes nicely.
- Vinegar: Apple cider vinegar offers a mellow tang, but lemon juice brightens better—swap based on your preference.
- Herbs & Spices: Fresh herbs like thyme or rosemary can be used instead of dried for a more vibrant, aromatic punch.
- Oil: Avocado or sesame oil add depth—if you skip oil, your chips might be less uniformly crispy but still tasty.
- Salt: Flavored salts (smoked, pink Himalayan) add extra dimension—use sparingly to avoid overpowering.
Equipment & Tools
- Mandoline or sharp knife: To get uniformly thin potato slices for even baking.
- Baking sheet: To hold the potato slices during baking.
- Parchment paper or silicone mat: To prevent sticking and facilitate easy cleanup.
- Cooling rack: To allow air circulation and keep chips crispy.
- Spatula or tongs: To handle hot chips safely during transfer.
Step-by-step guide to baked potato chips
- Preheat your oven to 160°C (320°F). Line a large baking sheet with parchment paper or a silicone baking mat to prevent sticking.
- Using a mandoline or sharp knife, slice the potatoes as thin as possible—about 1/16 inch thick. Aim for uniform slices for even baking.
- In a mixing bowl, toss the potato slices with a light drizzle of olive oil—about 1 tablespoon per 2 potatoes. Ensure each slice is evenly coated but not greasy.
- Spread the slices in a single layer on the prepared baking sheet. Avoid overlapping; give each slice space for crisping.
- Sprinkle generously with sea salt and any other seasonings you like—paprika, garlic powder, or cayenne work well. Adjust to taste.
- Bake for about 15-20 minutes. Check frequently after 12 minutes. The chips should turn golden around the edges and become crispy around 15-16 minutes.
- If some slices are browning faster, rotate the baking sheet. For uneven baking, switch racks halfway through cooking.
- Once golden and crisp, remove from the oven. Use tongs or a spatula to transfer the chips to a cooling rack immediately.
- Let the chips rest for 5 minutes. They will continue to crisp as they cool. Taste and add extra salt or seasoning if needed.
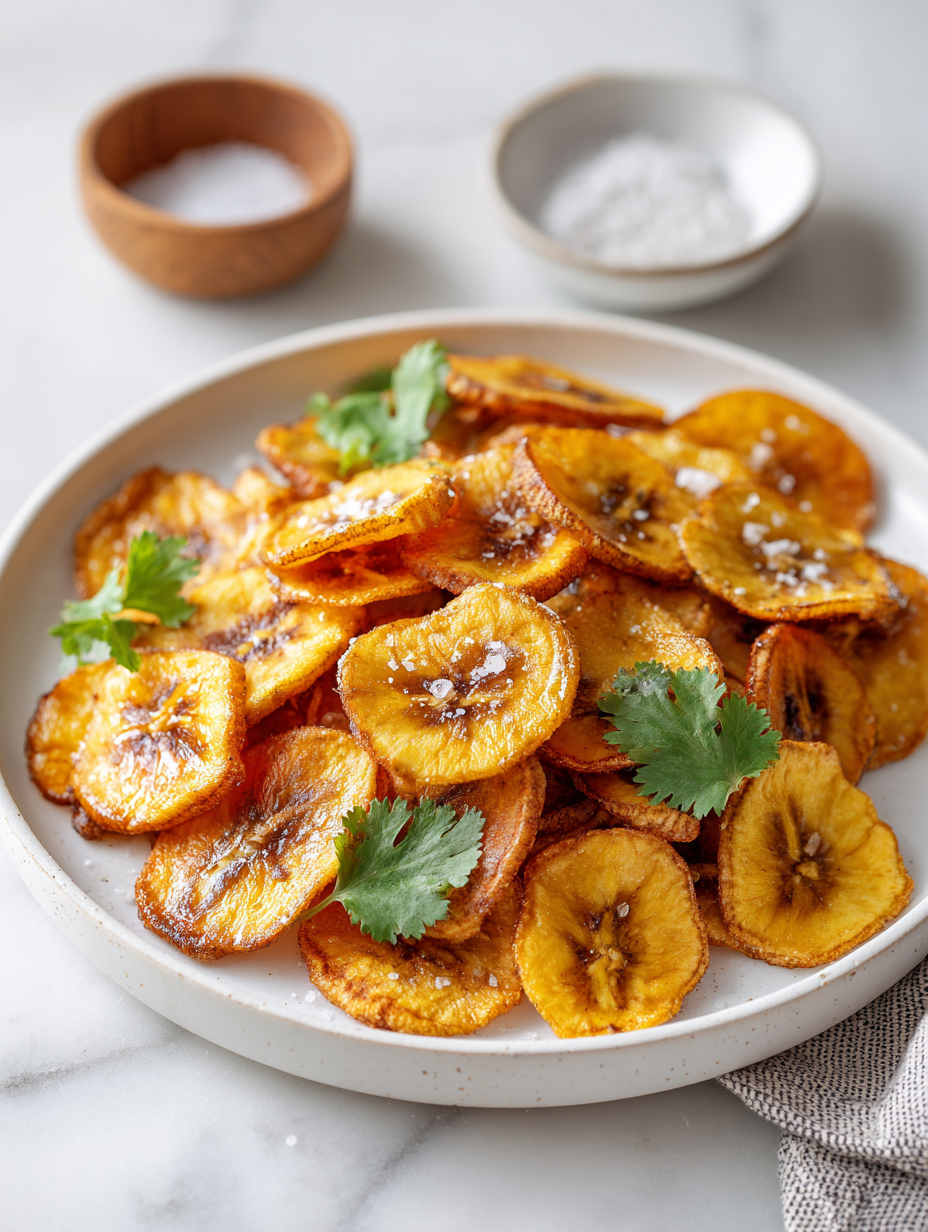
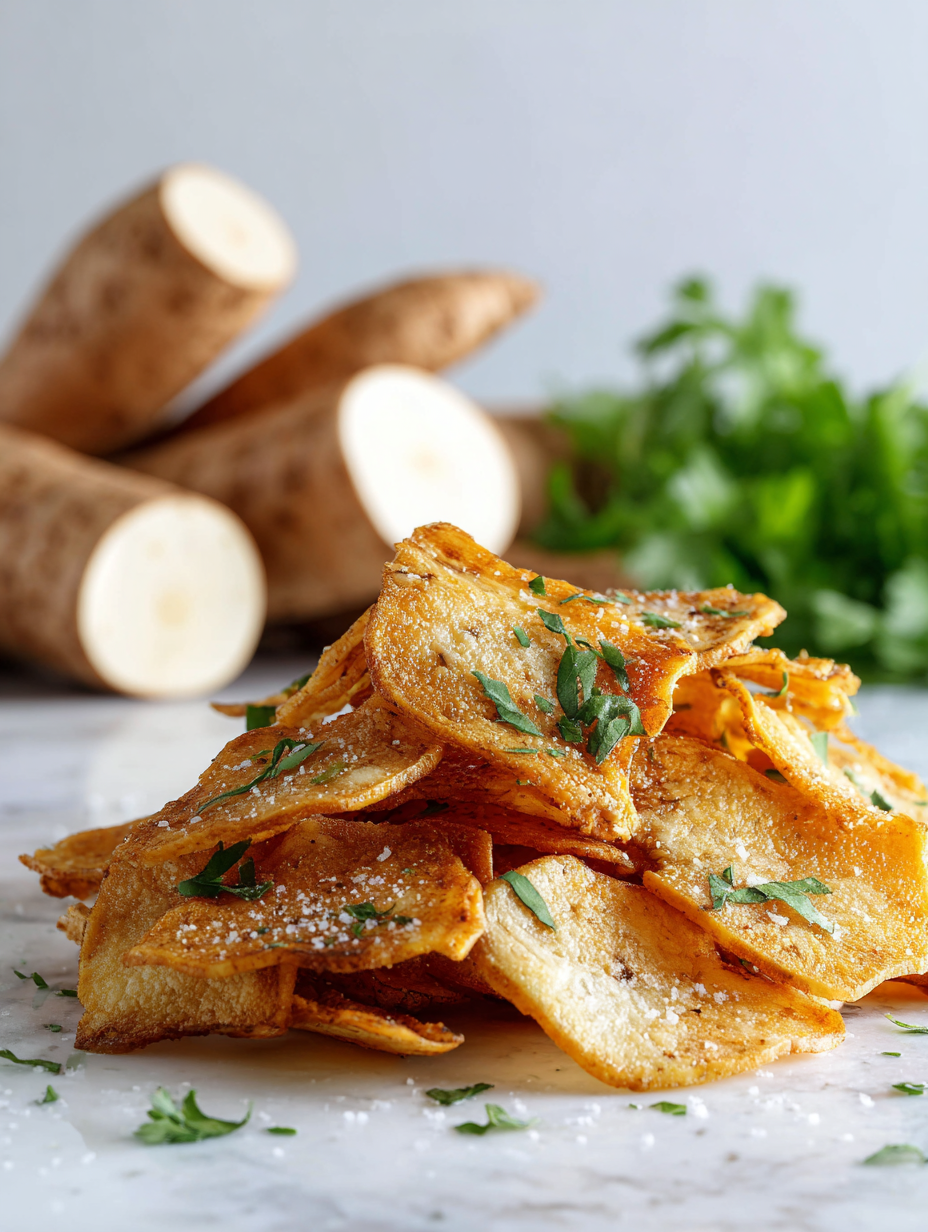
- Serve once cooled slightly; they should be crunchy, with a satisfying snap and a hint of smoky salt on your tongue.
Allow the chips to cool on a rack for 5 minutes. Serve immediately for maximum crunch or store in an airtight container once fully cooled to maintain crispness.
How to Know It’s Done
- Chips are golden and crisp around the edges.
- They make a cracking sound when broken.
- No soggy or limp spots; uniform crunch.
Baked Potato Chips
Ingredients
Equipment
Method
- Preheat your oven to 160°C (320°F) and line a baking sheet with parchment paper or a silicone mat to keep the chips from sticking.
- Using a mandoline or very sharp knife, slice the potatoes as thin as possible—about 1/16 inch—aiming for even, uniform slices that will crisp up nicely.
- Transfer the potato slices to a large mixing bowl and drizzle with the olive oil, tossing gently to ensure each slice is lightly coated without excess oil.
- Spread the slices out in a single layer on the prepared baking sheet, making sure they don’t overlap to promote even crisping.
- Sprinkle generously with sea salt, paprika, and any other seasonings you like, ensuring an even coating over all the slices.
- Bake for about 15-20 minutes, checking frequently after 12 minutes. The chips should turn golden around the edges and become crisp. Rotate the baking sheet if necessary for even browning.
- Once the chips are beautifully golden and crisp, remove the baking sheet from the oven and immediately transfer the chips to a cooling rack using tongs or a spatula.
- Let the chips cool for 5 minutes; they will continue to crisp up as they cool, resulting in a satisfying crunch with every bite.
- Once cooled slightly, enjoy your homemade baked potato chips immediately or store in an airtight container for up to 2 days, reheating briefly if needed for extra crunch.
Notes
Pro tips for perfect baked potato chips
- Bolded mini-head: Use a mandoline for ultra-thin, even slices that crisp up perfectly.
- Bolded mini-head: Keep slices spaced out on the baking sheet—crowding leads to soggy chips.
- Bolded mini-head: Lightly spray or toss with just a teaspoon of oil per batch for crunch without greasiness.
- Bolded mini-head: Bake at 160°C (320°F) for slow, steady crisping—check around 15 minutes to prevent burning.
- Bolded mini-head: Rotate the baking sheet halfway through to ensure even browning and crispness.
- Bolded mini-head: Immediately transfer hot chips to a cooling rack—air circulation keeps them crisp.
- Bolded mini-head: Season chips right after baking, while still warm, for better seasoning adhesion.
Common mistakes and how to fix them
- MISSED the potato slices thickness? Thin slices are key—use a mandoline for even crispiness.
- DUMPED too much oil? Use just a light spray or toss lightly—less oil equals crisper chips.
- OVER-TORCHED? Remove chips early—edges turn golden quickly, watch for that perfect hue.
- FORGOT to cool on a rack? Rest chips on a wire rack to prevent sogginess and maintain crunch.
Quick fixes and pantry swaps
- If chips are soggy, splash with a little more oil and return to oven for 2 minutes.
- When slices stick, patch with a quick spray of cooking spray and spread out again.
- DUMPED too much salt? Rinse lightly and pat dry before baking again.
- OVER-TORCHED edges? Shield with foil and lower oven temperature for a gentle finish.
- Splash a pinch of lemon juice if chips lose their brightness, adding a fresh shimmer.
Prep, store, and reheat tips
- Slice potatoes ahead of time; store in an airtight container in the fridge for up to 24 hours. Keep slices submerged in water to prevent browning and maintain freshness.
- You can bake the chips a day in advance; once cooled, keep in an airtight container at room temperature for up to 2 days. They will lose some crispness over time but remain tasty.
- Reheat chips in a 150°C (300°F) oven for about 5 minutes until warmed and crisp again. Keep an eye on them to avoid burning the edges.
- For best texture, avoid storing for more than 2 days. The chips tend to soften and lose their satisfying snap, especially if stored in a sealed bag or container.
- If chips become slightly limp, a quick re-bake on a baking sheet at 160°C (320°F) for 3-4 minutes can bring back some crunch and aroma, with a faint toasted aroma.
Top questions about baked potato chips
1. How thin should I slice the potatoes?
Slice potatoes as thin as possible, about 1/16 inch, for maximum crispness. Thicker slices stay soft inside.
2. How much oil is needed for baking?
Use a light spray or toss with just a teaspoon of oil per batch to keep chips crispy without greasiness.
3. What oven temperature and time should I use?
Bake at 160°C (320°F) for about 15-20 minutes. Check frequently after 12 minutes to prevent burning.
4. How do I keep the chips crispy after baking?
Immediately transfer hot chips to a cooling rack. This air circulation keeps them crispy as they cool.
5. How long can I store baked chips?
Store cooled chips in an airtight container at room temperature for up to 2 days. Reheat at 150°C (300°F) for 5 minutes if needed.
6. Can I use a regular knife instead of a mandoline?
Use a mandoline for even slices. Thicker slices may stay soft, and uneven slices won’t crisp uniformly.
7. What seasonings work best?
Choose flaky sea salt or smoked salt for added flavor. Seasonings like paprika or garlic powder enhance taste.
8. What if my chips turn out limp?
If chips are soggy, return them to the oven for a couple of minutes or increase oven temperature slightly.
9. Can I bake on a regular baking sheet without lining?
Use a silicone baking mat or parchment paper to prevent sticking and make cleanup easier.
10. When should I add seasonings?
Adjust seasonings after baking while chips are still warm. That helps the flavors stick better.
Making baked potato chips is a simple way to satisfy that crunch craving without the guilt. The aroma of toasty potatoes and the satisfying snap when you bite in make this habit hard to break.
Once you get the hang of thin slices and watching them turn golden, it becomes a quick, dependable snack that’s both satisfying and customizable. Plus, it’s effortless to tweak seasonings for different moods or meals.

Hi, I’m Lily Hayes, the cook, writer, and heart behind Loving This Process. This blog is built on a simple idea that food is not just about the final dish, but about everything that happens while you’re making it. The thinking, the tasting, the adjusting, the learning, and the quiet moments in between. Food has been a constant presence in my life, not as something flashy or perfect, but as something deeply grounding. Cooking has always felt like a process worth savoring, even when it’s messy, slow, or imperfect.
Leave a Reply