Kale often gets a bad rap for being tough and bitter, but when you bake it into chips, it’s a whole different story. There’s something satisfying about transforming those rugged leaves into crispy bites that crunch and melt on your tongue. It’s a way to make greens feel fun and totally snackable, even for the skeptics in the house.
I started making baked kale chips when I wanted a healthier crunch that didn’t come from potato chips or overly processed snacks. The process is so simple—just a quick toss with some oil and salt, then into the oven. The smell of toasted kale curling up in the oven is a strange comfort, like a reminder that simple ingredients can turn into something unexpectedly delightful.
This recipe became a staple in my kitchen because it feels good to turn something overlooked into a treat. It’s honest, no fuss, just a good way to sneak in greens and get a crispy, savory snack that’s actually satisfying. Plus, it’s a reminder that sometimes, the best things come from just a little heat and patience.
Focusing on the overlooked magic of transforming tough, bitter kale into crispy, savory treats through a simple baking process that elevates everyday greens into a snack everyone can enjoy.
The story behind this recipe
- Making baked kale chips started as a way to use up a bunch of kale I had in the fridge that was about to go limp. I wanted something crispy and satisfying, but still healthy enough to justify a snack. The first batch I made was kind of a mess—overcooked edges, too much salt—yet I was hooked.
- A friend mentioned how she baked kale with a splash of lemon juice for a tangy twist. That little tip made me experiment more, and now it’s become a go-to in my kitchen whenever I need a quick, honest snack that’s crunchy and flavorful. It’s a simple reminder that good things happen when you keep tweaking and tasting, even with humble ingredients.
- heading: ‘The story behind this recipe’
Key ingredients and tips
- Kale: I used curly kale because the ruffled edges crisp up beautifully—look for fresh, deep green leaves. If yours are limp or yellowed, skip them for better crunch.
- Olive oil: A light drizzle helps the leaves crisp without greasing them up. Too much and your chips feel greasy—just a thin coat will do the trick. Try avocado oil for a milder, buttery note.
- Salt: I prefer flaky sea salt because it melts into the surface, giving a burst of flavor with each bite. If you’re out, fine sea salt works, just use a little less to avoid overpowering.
- Optional seasonings: A pinch of smoked paprika or nutritional yeast adds a smoky or cheesy depth. Keep it light—these can easily tip into overwhelming if overdone.
- Lemon juice (optional): A squeeze before baking can brighten the flavor and cut bitterness. If you want a tangy kick, dab it on just before serving instead of baking with it, so it’s fresh and zingy.
- Baking sheet: Use a rimmed one lined with parchment to prevent sticking and ensure even crisping. Avoid overcrowding—leaves need space to crisp up properly.
- Oven temperature: 175°C (350°F) is ideal—hot enough to crisp but gentle enough to avoid burning. Keep an eye after 10 minutes and peek often to catch that perfect golden hue.
Spotlight on Key Ingredients
Kale:
- I use curly kale because the ruffled edges crisp superbly—look for vibrant, fresh leaves with no yellowing or limp spots; they crisp up more evenly and hold seasoning well.
- Olive oil: I prefer a light drizzle to help the leaves crisp without overwhelming them—if you want a milder flavor, try avocado oil, which also adds a buttery note. Too much oil makes chips greasy, so keep it thin and even.
Seasonings:
- Salt: I opt for flaky sea salt because it melts into the surface nicely, giving a burst of salty flavor with each crunch—if you only have fine salt, use a little less to prevent overpowering the greens.
- Seasonings (optional): A pinch of smoked paprika or nutritional yeast can add smoky or cheesy depth. They behave differently—smoked paprika gives a warm, oaky aroma, while nutritional yeast offers a cheesy, umami punch—use sparingly to avoid masking the kale’s natural flavor.
Notes for ingredient swaps
- Dairy-Free: Nutritional yeast adds a cheesy flavor without dairy—skip if you want to keep it vegan or avoid yeasty notes.
- Oil Choices: Avocado or toasted sesame oil can replace olive oil for a different rich aroma—use sparingly, as they’re stronger in flavor.
- Salt Variations: Kosher salt or Himalayan pink salt can be used for a more mineral-rich, crunch-enhancing finish—adjust quantity to taste.
- Seasoning Swaps: Smoked paprika or cumin powder bring a smoky or earthy depth—try ginger powder for a spicy kick instead.
- Lemon or Vinegar: A splash of apple cider vinegar before baking brightens the greens—omit if you prefer milder, more subdued flavor.
- Kale Alternatives: Spinach or Swiss chard can work in a pinch—just keep in mind they’ll be less crispy and more tender.
- Sweet Touch: A light drizzle of honey or maple syrup before baking can add a subtle sweetness—be careful not to oversweeten.
Equipment & Tools
- Baking sheet: To hold the kale evenly during baking.
- Parchment paper: For easy removal and to prevent sticking.
- Large mixing bowl: To toss and coat the kale leaves thoroughly.
- Tongs or hands: To handle and arrange the kale pieces.
Step-by-step guide to baked kale chips
- Preheat your oven to 175°C (350°F). Line a rimmed baking sheet with parchment paper for easy cleanup.
- Wash and thoroughly dry a bunch of kale. Remove tough stems and tear leaves into bite-sized pieces, around 2-3 inches.
- In a large bowl, drizzle kale with about 1 tablespoon of olive oil per bunch. Massage gently to coat each leaf evenly.
- Sprinkle with about 1/2 teaspoon of flaky sea salt or to taste. Toss again to distribute the salt evenly.
- Arrange the kale leaves in a single layer on the prepared baking sheet, leaving space between pieces. Overcrowding causes sogginess.
- Bake in the oven for 10-15 minutes. Check at the 10-minute mark; edges should be golden and crispy, not burnt.
- If some pieces are still limp, continue baking in 1-minute bursts. Keep an eye to avoid over-browning or burning.
- Once crisp and golden, remove from oven and let cool on the baking sheet for 5 minutes. This helps them crisp up further.
- Transfer to a plate or bowl, and serve immediately for the best crunch. For storage, keep in an airtight container, but eat within 2 days for optimal crispness.
Allow the chips to cool on the baking sheet for 5 minutes. Then, gently transfer to a plate or bowl. Serve immediately for maximum crunch, or store in an airtight container for up to 2 days.
How to Know It’s Done
- Edges are golden brown and crispy.
- Leaves crackle when handled or eaten.
- Color is vibrant green with a slight sheen of oil.
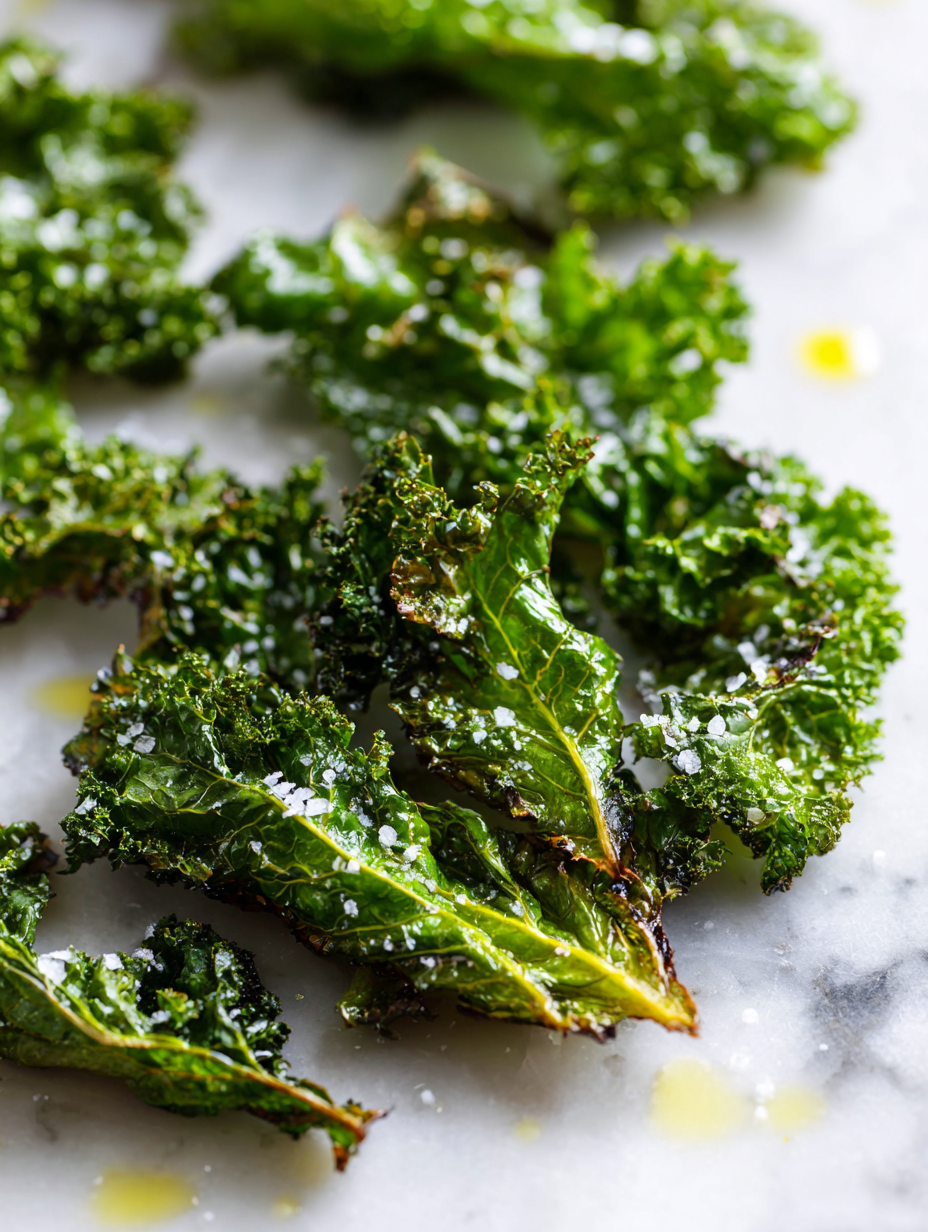
Baked Kale Chips
Ingredients
Equipment
Method
- Preheat your oven to 175°C (350°F) and line a baking sheet with parchment paper to prevent sticking.
- Thoroughly wash the kale and dry it completely using a salad spinner or paper towels—dry leaves crisp better and avoid sogginess.
- Remove the tough stems from the kale and tear the leaves into bite-sized pieces, about 2-3 inches across, ensuring they’re roughly uniform for even baking.
- Place the torn kale into a large mixing bowl and drizzle with about one tablespoon of olive oil. Gently massage the oil into the leaves, coating each piece evenly—this helps them crisp up nicely.
- Sprinkle the sea salt evenly over the kale and toss again using tongs or your hands to distribute the seasoning well.
- Arrange the kale leaves in a single layer on the prepared baking sheet, leaving space between pieces for air circulation—overcrowding leads to soggy chips.
- Bake in the oven for about 10-15 minutes, checking around the 10-minute mark. The edges should turn golden brown and become crispy, and the leaves will crackle when you handle them.
- If some pieces aren’t quite crispy yet, continue baking in 1-minute bursts, keeping a close eye to prevent burning.
- Once the kale chips are golden and crispy, remove from the oven and let them cool on the baking sheet for about 5 minutes; this helps them crisp further.
- Transfer the cooled chips to a plate or bowl, and enjoy immediately for the best crunch. Store leftovers in an airtight container for up to 2 days to maintain their crispness.
Pro tips for perfect kale chips
- Use very dry kale for better crisping—pat with paper towels or spin thoroughly in a salad spinner.
- Massage the oil into the leaves gently—this helps even coating and crispier chips.
- Keep the oven door slightly ajar during the last few minutes—prevent over-browning and help moisture escape.
- Flip or rotate the baking sheet halfway through—ensure even baking and uniform crunch.
- Sprinkle a tiny bit of seasoning after baking—preserves the fresh, vibrant flavor of herbs and spices.
- Use convection setting if available—circulates heat for more even, quicker crisping.
- Store cooled chips in an airtight container—best enjoyed within 2 days for maximum crunch.
Common mistakes and how to fix them
- FORGOT to dry kale thoroughly → Leaves stay soggy, dry completely for crispness.
- DUMPED too much oil → Overly greasy chips, use minimal oil for crunch.
- OVER-TORCHED kale → Burnt flavor, check oven at 10 minutes, remove when golden.
- SKIPPED cooling time → Chips lose crispness, cool for 5 minutes on sheet.
Quick Fixes for Kale Chips
- If kale appears limp, splash with cold water and pat dry thoroughly—crispier chips guaranteed.
- When chips are over-oily, dump them back in the oven for 2 minutes—crisping up while reducing greasiness.
- Over-torched edges? Patch with a quick scrape of a knife—prevent bitterness and uneven color.
- When chips are soggy after baking, shield with a paper towel—let sit for 5 seconds before serving.
- heading
Prep, store, and reheat tips
- Pre-wash and thoroughly dry kale leaves the day before—keeps them crisp and ready to bake.
- Store dried kale in an airtight container in the fridge for up to 24 hours before baking to maintain freshness.
- Baked kale chips are best enjoyed within 2 days; store in an airtight container away from moisture to preserve crunch.
- Reheat by briefly warming in a 150°C (300°F) oven for 2-3 minutes—watch for crackling sound to gauge crispness.
Top questions about kale chips
1. Should I dry the kale thoroughly before baking?
Use thoroughly dried kale leaves to ensure they crisp up well, avoiding sogginess and uneven texture.
2. How much oil do I really need for crispy chips?
A light drizzle of oil helps with crispness; too much makes them greasy and less crunchy.
3. What’s the ideal baking temperature and time?
Bake at 175°C (350°F) for 10-15 minutes. Check early to prevent burning, especially towards the end.
4. How do I know when the kale chips are ready?
They’re done when edges are golden, leaves crackle, and they hold a firm, crispy texture.
5. How should I store leftover kale chips?
Store in an airtight container away from moisture for up to 2 days to keep them crispy.
6. Can I reheat kale chips?
Reheat briefly at 150°C (300°F) for 2-3 minutes until crackling again—serve immediately for best texture.
7. Can I add other seasonings?
Use flaky sea salt for a burst of flavor; feel free to add smoked paprika or nutritional yeast for extra depth.
8. What type of kale works best?
Choose curly kale for the best ruffled texture; avoid limp or yellowed leaves for better crunch.
9. How do I prevent soggy chips?
Avoid overcrowding the baking sheet; leaves need space to crisp evenly and avoid sogginess.
10. What if my chips burn or stay limp?
If kale looks burnt, remove immediately; for limp chips, return to oven for a quick crisp-up.
Crunchy, savory, and a little smoky, these baked kale chips are a surprising way to enjoy greens. They remind me that simple ingredients, when treated right, turn into something memorable. It’s the kind of snack that makes me pause and appreciate the humble power of a good oven and patience. Sometimes, the best moments in the kitchen are just about letting good things happen naturally.’] }The end.
outro

Hi, I’m Lily Hayes, the cook, writer, and heart behind Loving This Process. This blog is built on a simple idea that food is not just about the final dish, but about everything that happens while you’re making it. The thinking, the tasting, the adjusting, the learning, and the quiet moments in between. Food has been a constant presence in my life, not as something flashy or perfect, but as something deeply grounding. Cooking has always felt like a process worth savoring, even when it’s messy, slow, or imperfect.
Leave a Reply